A Quick Guide to Containerizing Agent Applications with Podman
Alternative solutions compatible with Docker SDK


Introduction
For enterprise-level agent applications, the best way to safely run code generated by agents is to use containerization. This isolates the code execution environment from your server’s operating system.
In a previous article, we built a code interpreter sandbox based on a Jupyter container. We proved that once an agent has access to a stateful code runtime, it gains the ability to solve complex problems and perform data analysis:
However, Docker Desktop is off-limits in most enterprises due to its commercial license restrictions.
Yet our multi-agent development work absolutely depends on a containerized environment. So we must find a suitable alternative. Ideally, one fully compatible with Docker, so it works seamlessly with existing agent frameworks that rely on the Docker client.
Podman is exactly what we need. Developed by Red Hat, it’s an open-source container management tool that runs on both Mac and Windows. It can fully replace Docker Desktop in your development setup.
This short post will help you quickly set up Podman so you can start building agent applications with code interpreters right away. If you’d like deeper background knowledge and a more thorough introduction to Podman, I highly recommend the Podman for the Absolute Beginners - Hands-On DevOps course on Udemy.
Quick Start
Prerequisites
This guide assumes you’re developing on Windows 11. From what I know, setup on Mac is even simpler.
Podman runs its host inside a Linux system on WSL2. So before proceeding, make sure you’ve already installed WSL2 on your machine.
If your company requires a VPN to access the internet, you’ll also need to configure WSL2. To do this, create a .wslconfig file in your Windows %USERPROFILE% directory (your user folder) with the following content:
[experimental]
autoMemoryReclaim=gradual
networkingMode=mirrored
dnsTunneling=true
firewall=true
autoProxy=true
Install Podman
As mentioned, Podman’s host runs in a WSL2-based Linux environment called podman-machine-default. So when installing Podman, you actually need to set up this podman-machine-default.
One approach is to install Podman Desktop first, then create the podman-machine-default through its interface. But for some reason, this always failed for me—the installer would just hang.
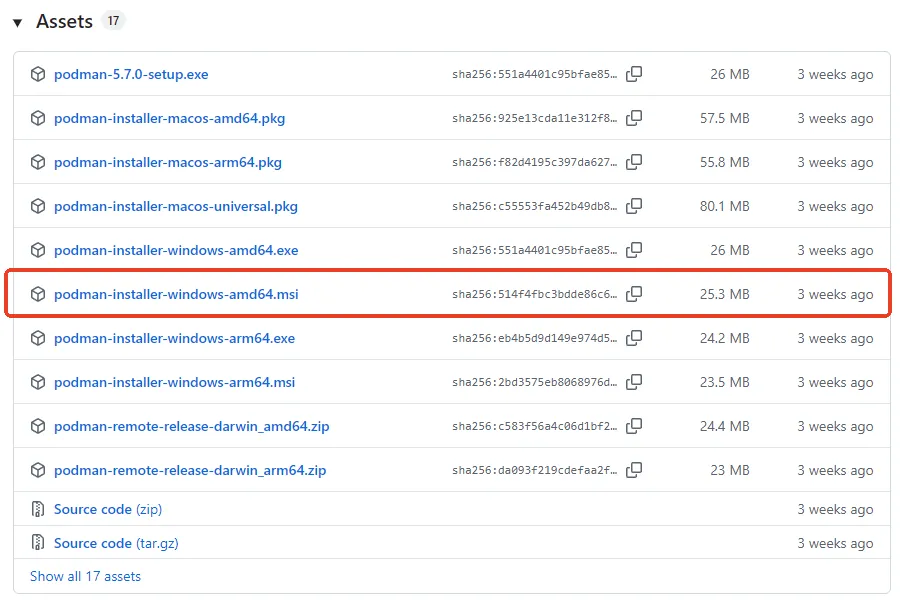
So I went the other way: I installed podman-machine standalone first, then installed Podman Desktop. Go to Podman’s GitHub Releases page, download the latest .msi installer, and run it.
After installation, create your podman-machine-default host:
podman machine init --rootful=trueImportant note: if your agent framework uses the Docker SDK to launch containers, you must set --rootful=true. I’ll explain why later.
Next, install Podman Desktop from here. Just click “Next” all the way through.
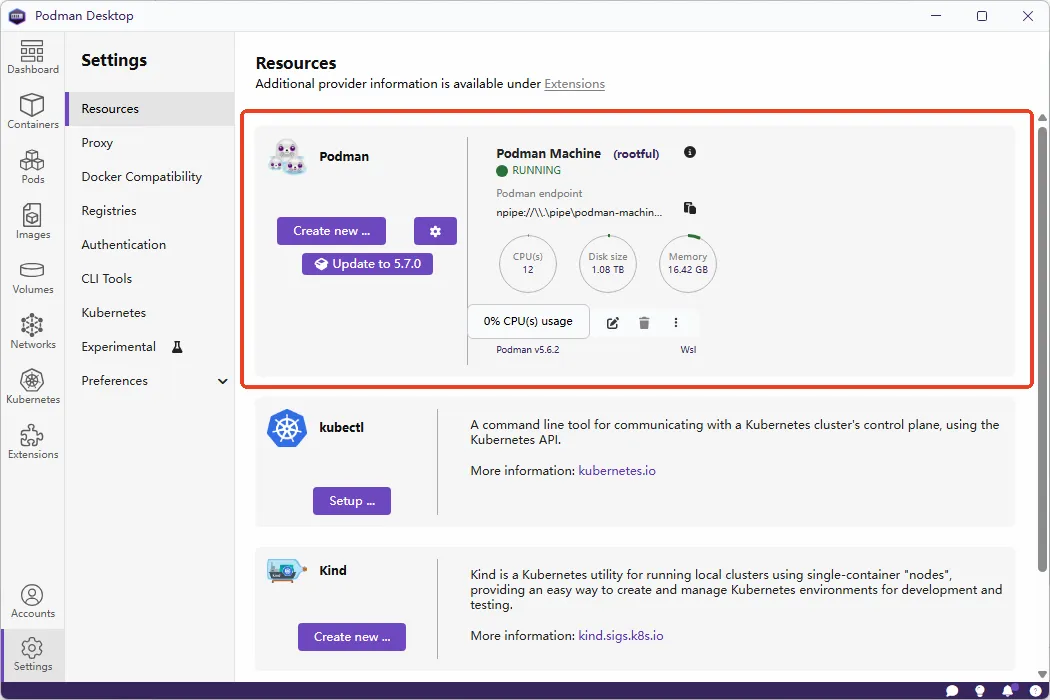
Once done, open Podman Desktop from your taskbar, go to the Settings tab, and check Resources. You should see the podman-machine you just created. That means Podman Desktop is ready.
But since your agents will use the Docker SDK to manage containers, you need to enable Docker compatibility in Podman Desktop, as shown below:
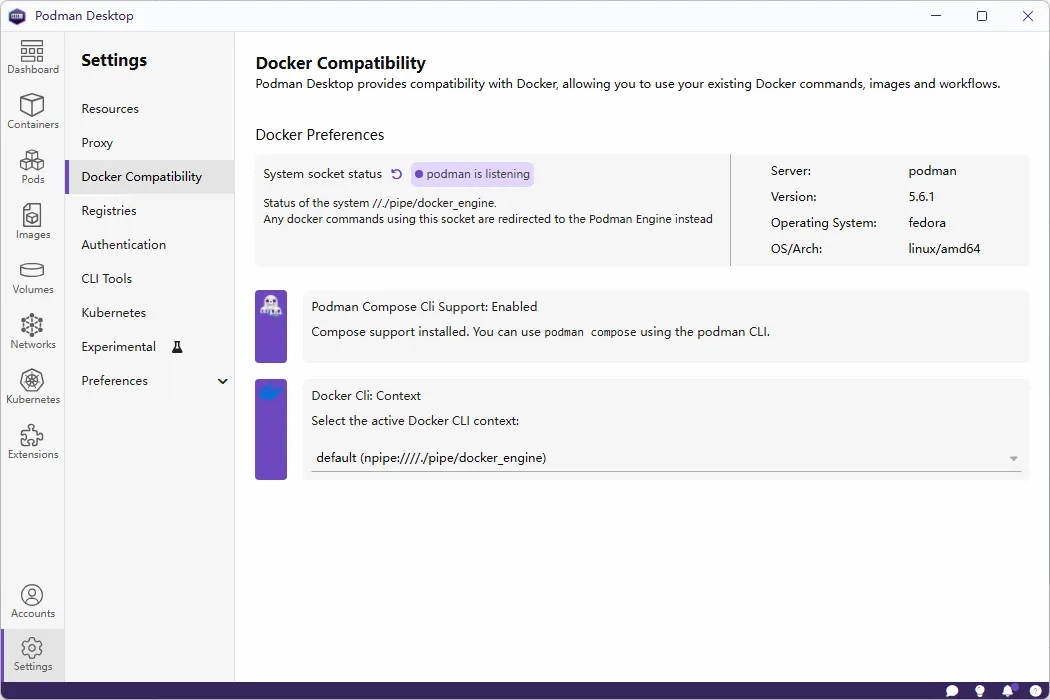
This setting also enables Podman Compose, which lets you route docker compose commands to podman compose.
Set up proxy configuration
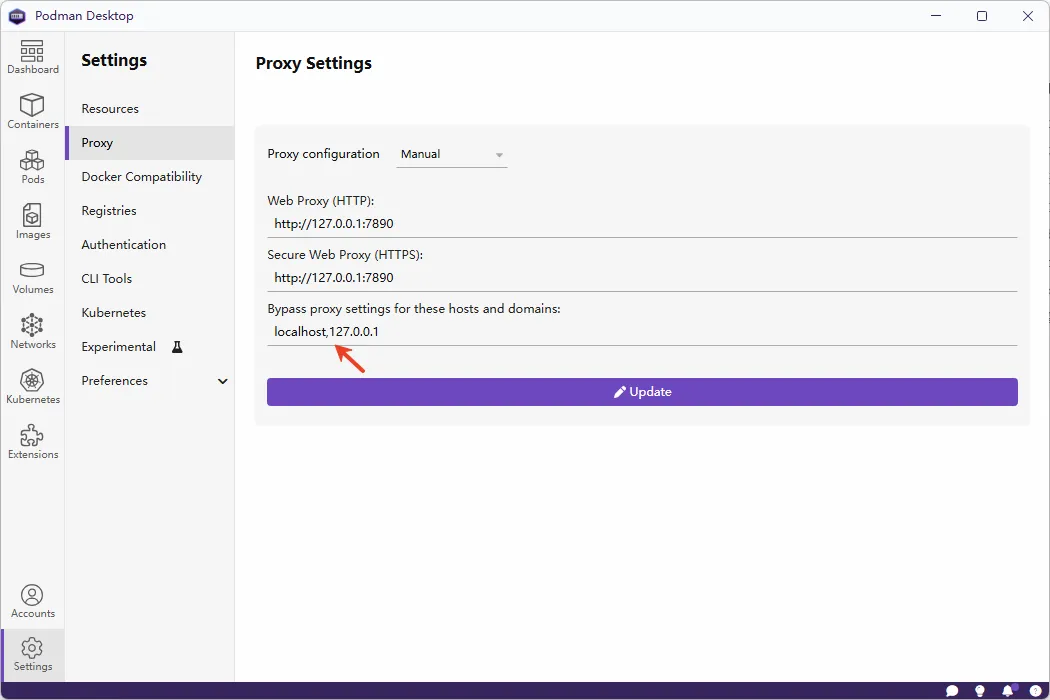
If your system uses a system-wide proxy, Podman Desktop will automatically pick it up. But here’s the catch: Podman Desktop applies these settings inside the podman-machine Linux system. Unlike Windows, where bypass domains are separated by semicolons, Linux uses commas. You’ll need to manually adjust this, or your podman-machine might lose external network access.
Create a soft link for the storage path
By default, Podman stores data in %USERPROFILE%\.local\share\containers\podman.
I really dislike keeping data files on the C drive. I prefer moving them to D drive—for example, D:\Documents\AppData\podman.
Here’s how: copy everything from the C-drive podman folder to your new D-drive location, delete the original C-drive folder, then create a junction link (remember to replace %USERPROFILE% with your actual path):
mklink /j C:\Users\qianpeng\.local\share\containers\podman D:\Documents\AppData\podmanNow everything works normally, but your data lives safely on D drive—no risk of losing it during a system reinstall.
Test your Podman installation
If you followed my earlier article and created a Dockerfile for a jupyter-server, you can now test whether Podman builds images correctly. Navigate to your Dockerfile directory and run:
podman build --network=host -t jupyter-server .Remember, the podman-machine host is network-isolated from your Windows system. The --network=host flag lets the build process access your Windows network, making it easier to pull base images and install Python packages from PyPI.
Note: this flag only affects image building—it has no impact when running containers.
Make Docker CLI commands work
If you’re used to typing docker commands, here’s a neat trick: create a docker.bat file in %USERPROFILE%/.local/bin (Make sure this path is in your system PATH).
Put this inside docker.bat:
@echo off
setlocal EnableDelayedExpansion
if "%~1"=="build" (
	shift
	rem Default to --network=host
	podman build --network=host %2 %3 %4 %5 %6 %7 %8 %9
) else (
	podman %*
)
endlocal
Now you can keep using docker commands as usual. Since Podman’s CLI is mostly compatible with Docker’s, everything feels the same—except when you run docker build, it automatically adds --network=host to the underlying podman build command.
Call Docker SDK from inside a containerized app
If your agent app runs inside a container and needs to use the Docker SDK to spin up Python code interpreter containers (a common pattern across agent frameworks), you’ll need to let the SDK talk to Podman.
Do this by mounting the podman.sock socket into your app container so the Docker SDK can reach it:
docker run -v /run/podman/podman.sock:/var/run/docker.sock --rm app-testAgain, your podman-machine-default must be initialized with --rootful=true.
Fix Docker SDK timeout issues
When your agent generates code and sends it via Docker SDK to a code interpreter container, there’s often a delay between code generations while the LLM produces tokens. On the second SDK call, you might hit a timeout like this:
requests.exceptions.ConnectionError: ('Connection aborted.', RemoteDisconnected('Remote end closed connection without response'))This happens because podman-machine sets a very short service_timeout for its engine by default.
Fix it by SSHing into your podman-machine:
💡 Unlock Full Access for Free!
Subscribe now to read this article and get instant access to all exclusive member content + join our data science community discussions.